きままな日常、思いつき、毒舌、言いたい放題・・・PCネタ、ガンダムネタが楽しいです。
「Windows 10 Th2」へアップグレード [コンピュータ]
「Windows 10 Th2」へアップグレードしました。
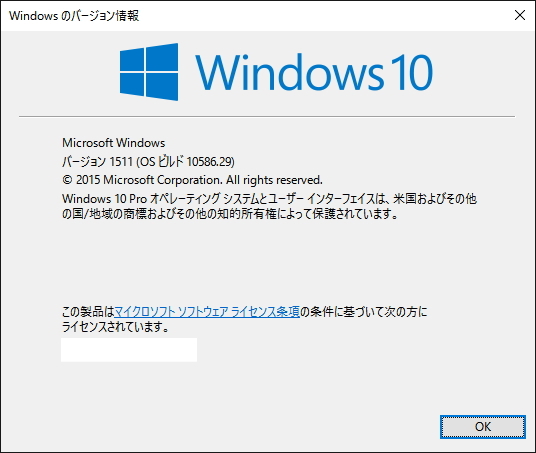
パッと見はあまり変化を感じませんが、iTunesを起動したときに、再度認証が必要になりました。
OSのバージョン変更のせいですかね?

パッと見はあまり変化を感じませんが、iTunesを起動したときに、再度認証が必要になりました。
OSのバージョン変更のせいですかね?
デジカメ新調「EOS Kiss X8i」 [hobby 趣味]
デジカメを新調しました。
キヤノンの「EOS Kiss X8i」です。
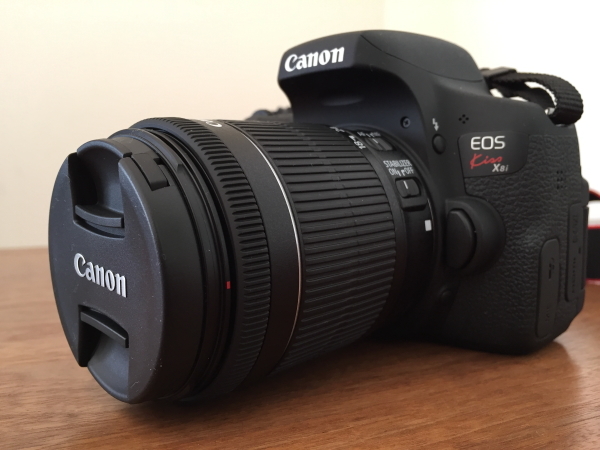
カメラを持ってお出かけ・・・の機会が減っているので、私自身が使うことはだいぶ少なそうです。。。

キヤノンの「EOS Kiss X8i」です。

カメラを持ってお出かけ・・・の機会が減っているので、私自身が使うことはだいぶ少なそうです。。。
Canon デジタル一眼レフカメラ EOS Kiss X8i レンズキット EF-S18-55mm F3.5-5.6 IS STM 付属 KISSX8I-1855ISSTMLK
- 出版社/メーカー: キヤノン
- メディア: Camera
「映画 妖怪ウォッチ エンマ大王と5つの物語だニャン!」観てきました [Rest 息抜き]
久しぶりの更新です。
いろいろ忙しくて、さぼり気味でした。
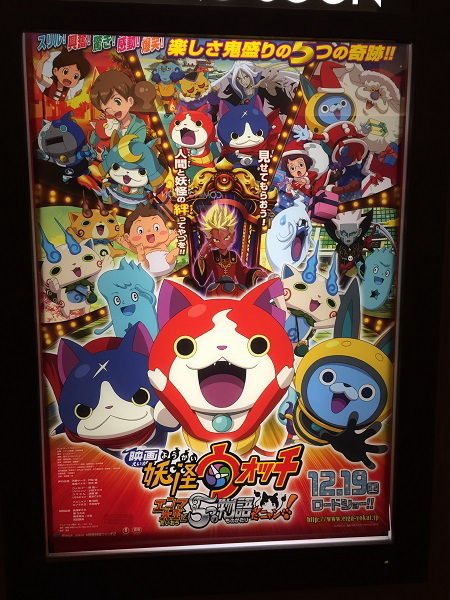
「映画 妖怪ウォッチ エンマ大王と5つの物語だニャン!」観てきました。
http://www.eiga-yokai.jp/
5つの物語・・・とあるとおり、短編を組み合わせた感じです。
あちこちつまみ食いした感じで、個人的的には前作のほうがよかったかなぁと。
子供たちは、入場者限定プレゼントのメダルに喜んでいましたが。
劇場では、
話題の「スター・ウォーズ/フォースの覚醒」も公開されていましたが、お客さんの入り具合は、ちょっとわかりませんでした。
http://starwars.disney.co.jp/movie/force.html

いろいろ忙しくて、さぼり気味でした。
「映画 妖怪ウォッチ エンマ大王と5つの物語だニャン!」観てきました。

http://www.eiga-yokai.jp/
5つの物語・・・とあるとおり、短編を組み合わせた感じです。
あちこちつまみ食いした感じで、個人的的には前作のほうがよかったかなぁと。
子供たちは、入場者限定プレゼントのメダルに喜んでいましたが。
劇場では、
話題の「スター・ウォーズ/フォースの覚醒」も公開されていましたが、お客さんの入り具合は、ちょっとわかりませんでした。
http://starwars.disney.co.jp/movie/force.html


![機動戦士ガンダム THE ORIGIN II [DVD]](https://images-fe.ssl-images-amazon.com/images/I/51wA9GlQdBL._SL160_.jpg "機動戦士ガンダム THE ORIGIN II [DVD]")
anonのゴーグル「MIG」購入 [hobby 趣味]
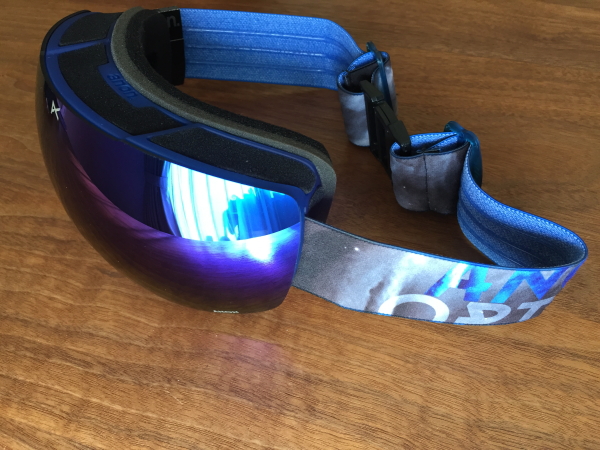
スノボ用のゴーグルを新調しました。
anonのゴーグル「MIG」。

雪が降って、スキー場がオープンするのが待ち遠しい。
 anon ゴーグル ASIAN FIT MIG MFI フェイスマスク付き SUPERNOVA/ BLUE COBALT + AMBER アノン ゴーグル 15-16 アジアンフィット スノーボードゴーグル")
anonのゴーグル「MIG」。
雪が降って、スキー場がオープンするのが待ち遠しい。
- 出版社/メーカー: anon.(アノン)
- メディア: その他
「人魚の眠る家」:東野圭吾 購入 [hobby 趣味]
「人魚の眠る家」購入しました。

長い通勤時間のお供です。

blogの更新が滞り気味ですが、生きてます。。。
長い通勤時間のお供です。
- 作者: 東野 圭吾
- 出版社/メーカー: 幻冬舎
- 発売日: 2015/11/18
- メディア: 単行本
blogの更新が滞り気味ですが、生きてます。。。
Centos7.0 KVMによる仮想マシン環境構築 [コンピュータ]
PCネタを連投。
Centos7.0でKVMによる仮想マシン環境構築します。
インストールは終わっていて、ネットワークやらなんらやの設定は終わっているのが前提
仮想マシンは、NATじゃなくて仮想ブリッジ経由で外部と通信をします。
--------------------
■yum リポジトリサーバをrikenへ変更 これやっておかないと、updateできない
vi /etc/yum.repos.d/CentOS-Base.repo
mirrorlistをコメントアウト、
baseurl=http://ftp.riken.jp/Linux/centos/$releasever/os/$basearch/ を追加
[root@localhost etc]# cat /etc/yum.repos.d/CentOS-Base.repo
# CentOS-Base.repo
#
# The mirror system uses the connecting IP address of the client and the
# update status of each mirror to pick mirrors that are updated to and
# geographically close to the client. You should use this for CentOS updates
# unless you are manually picking other mirrors.
#
# If the mirrorlist= does not work for you, as a fall back you can try the
# remarked out baseurl= line instead.
#
#
[base]
name=CentOS-$releasever - Base
#mirrorlist=http://mirrorlist.centos.org/?release=$releasever&arch=$basearch&repo=os&infra=$infra
#baseurl=http://mirror.centos.org/centos/$releasever/os/$basearch/
baseurl=http://ftp.riken.jp/Linux/centos/$releasever/os/$basearch/
gpgcheck=1
gpgkey=file:///etc/pki/rpm-gpg/RPM-GPG-KEY-CentOS-7
#released updates
[updates]
name=CentOS-$releasever - Updates
#mirrorlist=http://mirrorlist.centos.org/?release=$releasever&arch=$basearch&repo=updates&infra=$infra
#baseurl=http://mirror.centos.org/centos/$releasever/updates/$basearch/
baseurl=http://ftp.riken.jp/Linux/centos/$releasever/os/$basearch/
gpgcheck=1
gpgkey=file:///etc/pki/rpm-gpg/RPM-GPG-KEY-CentOS-7
#additional packages that may be useful
[extras]
name=CentOS-$releasever - Extras
#mirrorlist=http://mirrorlist.centos.org/?release=$releasever&arch=$basearch&repo=extras&infra=$infra
#baseurl=http://mirror.centos.org/centos/$releasever/extras/$basearch/
baseurl=http://ftp.riken.jp/Linux/centos/$releasever/os/$basearch/
gpgcheck=1
gpgkey=file:///etc/pki/rpm-gpg/RPM-GPG-KEY-CentOS-7
#additional packages that extend functionality of existing packages
[centosplus]
name=CentOS-$releasever - Plus
#mirrorlist=http://mirrorlist.centos.org/?release=$releasever&arch=$basearch&repo=centosplus&infra=$infra
#baseurl=http://mirror.centos.org/centos/$releasever/centosplus/$basearch/
baseurl=http://ftp.riken.jp/Linux/centos/$releasever/os/$basearch/
gpgcheck=1
enabled=0
gpgkey=file:///etc/pki/rpm-gpg/RPM-GPG-KEY-CentOS-7
-----------------
■デバイス確認
[root@localhost ~]# nmcli device
デバイス タイプ 状態 接続
enp14s0 ethernet 接続済み enp14s0
lo loopback 管理無し --
#必ずしも、「enp14s0」ではない環境によって読み替え必要
-----------------
■KVM使用可否確認
[root@localhost ~]# grep -E 'svm|vmx' /proc/cpuinfo > /dev/null && echo OK
OK ← OKと表示されれば完全仮想化対応CPU
[root@localhost ~]# grep flags /proc/cpuinfo|grep lm > /dev/null && echo OK
OK ← OKと表示されれば64ビットCPU
-----------------
■仮想化関連パッケージインストール
[root@localhost ~]# yum -y groupinstall "Virtualization Host"
[root@localhost ~]#yum -y install qemu-kvm libvirt virt-install bridge-utils
オフラインゲスト編集ツールインストール
[root@localhost ~]# yum -y install '*guestf*'
-----------------
■仮想マシン制御起動
[root@localhost ~]# systemctl start libvirtd ←起動
[root@localhost ~]# systemctl enable libvirtd ←自動起動
-----------------
■ホストマシンのシャットダウン時にKVMゲストを自動でシャットダウンする
[root@localhost ~]# vi /etc/sysconfig/libvirt-guests
# URIs to check for running guests
# example: URIS='default xen:/// vbox+tcp://host/system lxc:///'
#URIS=default
# action taken on host boot
# - start all guests which were running on shutdown are started on boot
# regardless on their autostart settings
# - ignore libvirt-guests init script won't start any guest on boot, however,
# guests marked as autostart will still be automatically started by
# libvirtd
#ON_BOOT=start
# Number of seconds to wait between each guest start. Set to 0 to allow
# parallel startup.
#START_DELAY=0
# action taken on host shutdown
# - suspend all running guests are suspended using virsh managedsave
# - shutdown all running guests are asked to shutdown. Please be careful with
# this settings since there is no way to distinguish between a
# guest which is stuck or ignores shutdown requests and a guest
# which just needs a long time to shutdown. When setting
# ON_SHUTDOWN=shutdown, you must also set SHUTDOWN_TIMEOUT to a
# value suitable for your guests.
#ON_SHUTDOWN=suspend
ON_SHUTDOWN=shutdown ←コメントアウトを外して変更
# If set to non-zero, shutdown will suspend guests concurrently. Number of
# guests on shutdown at any time will not exceed number set in this variable.
#PARALLEL_SHUTDOWN=0
PARALLEL_SHUTDOWN=4 ←コメントアウトを外して変更
# Number of seconds we're willing to wait for a guest to shut down. If parallel
# shutdown is enabled, this timeout applies as a timeout for shutting down all
# guests on a single URI defined in the variable URIS. If this is 0, then there
# is no time out (use with caution, as guests might not respond to a shutdown
# request). The default value is 300 seconds (5 minutes).
#SHUTDOWN_TIMEOUT=300
SHUTDOWN_TIMEOUT=300 ←コメントアウトを外して変更
# If non-zero, try to bypass the file system cache when saving and
# restoring guests, even though this may give slower operation for
# some file systems.
#BYPASS_CACHE=0
-----------------
■仮想ブリッジ作成と設定 ※IPアドレスとインターフェイスは読み替える
br0 を新規作成
[root@localhost ~]# nmcli connection add type bridge autoconnect yes con-name br0 ifname br0
br0 のスパニングツリー設定を無効化
# nmcli connection modify br0 bridge.stp no
「br0」の IPアドレス設定
[root@localhost ~]# nmcli connection modify br0 ipv4.addresses 192.168.1.x/24 ipv4.method manual
「br0」の ゲートウェイ設定
[root@localhost ~]# nmcli connection modify br0 ipv4.gateway 192.168.1.x
「br0」の DNS 設定
[root@localhost ~]# nmcli connection modify br0 ipv4.dns 192.168.1.x
※ここからはリモート接続していると切れるので実機上でやること
# 既存のインターフェースは一旦削除 「enp14s0」は読み替え
[root@localhost ~]# nmcli connection delete enp14s0
# 「br0」のメンバーとして再度追加
[root@localhost ~]# nmcli connection add type bridge-slave autoconnect yes con-name enp14s0 ifname enp14s0 master br0
# NetworkManager 停止 & 起動で設定を有効にする
[root@localhost ~]# systemctl stop NetworkManager; systemctl start NetworkManager
念のため再起動
[root@localhost ~]# shutdown -r now
-----------------
■ゲストOSのインストール
GUI で仮想マシンの作成するため仮想マシンマネージャーをインストール
[root@localhost ~]# yum -y install virt-manager
ここから先はGUIの作業
Windowsからリモートデスクトップ接続して作業します
-----------------
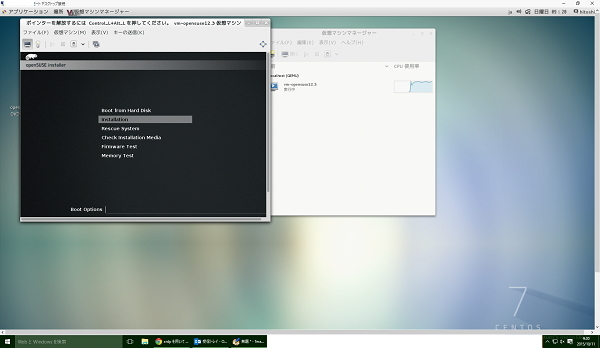
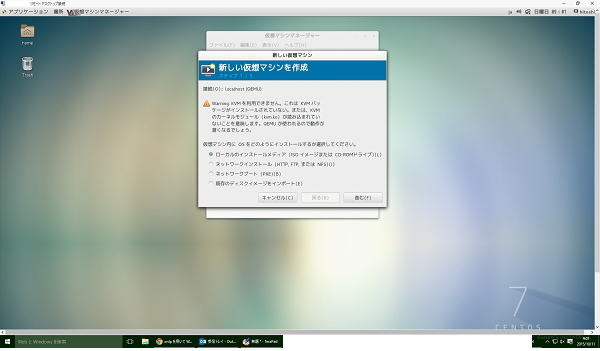
仮想マシンマネージャーを起動して、ゲストを作成

CPUのコア数、HDDサイズ、メモリ容量などを割り当て、ISOイメージから起動。
DVDブートと同じ起動画面がくるので、通常と同じように設定してあげれば、ゲストOSのインストールは完了です。
いろいろなweサイトを参考にさせていただきました
https://centossrv.com/kvm.shtml
http://www.server-world.info/query?os=CentOS_7&p=kvm
http://www.torutk.com/projects/swe/wiki/Linux_KVM%E3%83%9B%E3%82%B9%E3%83%88%E3%81%AE%E3%83%8D%E3%83%83%E3%83%88%E3%83%AF%E3%83%BC%E3%82%AF%E8%A8%AD%E5%AE%9A-CentOS_7
http://spacekey.info/blog/archives/853
http://www.torutk.com/projects/swe/wiki/Linux_KVM%E6%93%8D%E4%BD%9C
http://orange.servecounterstrike.com/html/tomokaku_archives/2015/05/kvmguest-create.html
http://e-garakuta.net/techinfo/doku.php/linux/kvm
Centos7.0でKVMによる仮想マシン環境構築します。
インストールは終わっていて、ネットワークやらなんらやの設定は終わっているのが前提
仮想マシンは、NATじゃなくて仮想ブリッジ経由で外部と通信をします。
--------------------
■yum リポジトリサーバをrikenへ変更 これやっておかないと、updateできない
vi /etc/yum.repos.d/CentOS-Base.repo
mirrorlistをコメントアウト、
baseurl=http://ftp.riken.jp/Linux/centos/$releasever/os/$basearch/ を追加
[root@localhost etc]# cat /etc/yum.repos.d/CentOS-Base.repo
# CentOS-Base.repo
#
# The mirror system uses the connecting IP address of the client and the
# update status of each mirror to pick mirrors that are updated to and
# geographically close to the client. You should use this for CentOS updates
# unless you are manually picking other mirrors.
#
# If the mirrorlist= does not work for you, as a fall back you can try the
# remarked out baseurl= line instead.
#
#
[base]
name=CentOS-$releasever - Base
#mirrorlist=http://mirrorlist.centos.org/?release=$releasever&arch=$basearch&repo=os&infra=$infra
#baseurl=http://mirror.centos.org/centos/$releasever/os/$basearch/
baseurl=http://ftp.riken.jp/Linux/centos/$releasever/os/$basearch/
gpgcheck=1
gpgkey=file:///etc/pki/rpm-gpg/RPM-GPG-KEY-CentOS-7
#released updates
[updates]
name=CentOS-$releasever - Updates
#mirrorlist=http://mirrorlist.centos.org/?release=$releasever&arch=$basearch&repo=updates&infra=$infra
#baseurl=http://mirror.centos.org/centos/$releasever/updates/$basearch/
baseurl=http://ftp.riken.jp/Linux/centos/$releasever/os/$basearch/
gpgcheck=1
gpgkey=file:///etc/pki/rpm-gpg/RPM-GPG-KEY-CentOS-7
#additional packages that may be useful
[extras]
name=CentOS-$releasever - Extras
#mirrorlist=http://mirrorlist.centos.org/?release=$releasever&arch=$basearch&repo=extras&infra=$infra
#baseurl=http://mirror.centos.org/centos/$releasever/extras/$basearch/
baseurl=http://ftp.riken.jp/Linux/centos/$releasever/os/$basearch/
gpgcheck=1
gpgkey=file:///etc/pki/rpm-gpg/RPM-GPG-KEY-CentOS-7
#additional packages that extend functionality of existing packages
[centosplus]
name=CentOS-$releasever - Plus
#mirrorlist=http://mirrorlist.centos.org/?release=$releasever&arch=$basearch&repo=centosplus&infra=$infra
#baseurl=http://mirror.centos.org/centos/$releasever/centosplus/$basearch/
baseurl=http://ftp.riken.jp/Linux/centos/$releasever/os/$basearch/
gpgcheck=1
enabled=0
gpgkey=file:///etc/pki/rpm-gpg/RPM-GPG-KEY-CentOS-7
-----------------
■デバイス確認
[root@localhost ~]# nmcli device
デバイス タイプ 状態 接続
enp14s0 ethernet 接続済み enp14s0
lo loopback 管理無し --
#必ずしも、「enp14s0」ではない環境によって読み替え必要
-----------------
■KVM使用可否確認
[root@localhost ~]# grep -E 'svm|vmx' /proc/cpuinfo > /dev/null && echo OK
OK ← OKと表示されれば完全仮想化対応CPU
[root@localhost ~]# grep flags /proc/cpuinfo|grep lm > /dev/null && echo OK
OK ← OKと表示されれば64ビットCPU
-----------------
■仮想化関連パッケージインストール
[root@localhost ~]# yum -y groupinstall "Virtualization Host"
[root@localhost ~]#yum -y install qemu-kvm libvirt virt-install bridge-utils
オフラインゲスト編集ツールインストール
[root@localhost ~]# yum -y install '*guestf*'
-----------------
■仮想マシン制御起動
[root@localhost ~]# systemctl start libvirtd ←起動
[root@localhost ~]# systemctl enable libvirtd ←自動起動
-----------------
■ホストマシンのシャットダウン時にKVMゲストを自動でシャットダウンする
[root@localhost ~]# vi /etc/sysconfig/libvirt-guests
# URIs to check for running guests
# example: URIS='default xen:/// vbox+tcp://host/system lxc:///'
#URIS=default
# action taken on host boot
# - start all guests which were running on shutdown are started on boot
# regardless on their autostart settings
# - ignore libvirt-guests init script won't start any guest on boot, however,
# guests marked as autostart will still be automatically started by
# libvirtd
#ON_BOOT=start
# Number of seconds to wait between each guest start. Set to 0 to allow
# parallel startup.
#START_DELAY=0
# action taken on host shutdown
# - suspend all running guests are suspended using virsh managedsave
# - shutdown all running guests are asked to shutdown. Please be careful with
# this settings since there is no way to distinguish between a
# guest which is stuck or ignores shutdown requests and a guest
# which just needs a long time to shutdown. When setting
# ON_SHUTDOWN=shutdown, you must also set SHUTDOWN_TIMEOUT to a
# value suitable for your guests.
#ON_SHUTDOWN=suspend
ON_SHUTDOWN=shutdown ←コメントアウトを外して変更
# If set to non-zero, shutdown will suspend guests concurrently. Number of
# guests on shutdown at any time will not exceed number set in this variable.
#PARALLEL_SHUTDOWN=0
PARALLEL_SHUTDOWN=4 ←コメントアウトを外して変更
# Number of seconds we're willing to wait for a guest to shut down. If parallel
# shutdown is enabled, this timeout applies as a timeout for shutting down all
# guests on a single URI defined in the variable URIS. If this is 0, then there
# is no time out (use with caution, as guests might not respond to a shutdown
# request). The default value is 300 seconds (5 minutes).
#SHUTDOWN_TIMEOUT=300
SHUTDOWN_TIMEOUT=300 ←コメントアウトを外して変更
# If non-zero, try to bypass the file system cache when saving and
# restoring guests, even though this may give slower operation for
# some file systems.
#BYPASS_CACHE=0
-----------------
■仮想ブリッジ作成と設定 ※IPアドレスとインターフェイスは読み替える
br0 を新規作成
[root@localhost ~]# nmcli connection add type bridge autoconnect yes con-name br0 ifname br0
br0 のスパニングツリー設定を無効化
# nmcli connection modify br0 bridge.stp no
「br0」の IPアドレス設定
[root@localhost ~]# nmcli connection modify br0 ipv4.addresses 192.168.1.x/24 ipv4.method manual
「br0」の ゲートウェイ設定
[root@localhost ~]# nmcli connection modify br0 ipv4.gateway 192.168.1.x
「br0」の DNS 設定
[root@localhost ~]# nmcli connection modify br0 ipv4.dns 192.168.1.x
※ここからはリモート接続していると切れるので実機上でやること
# 既存のインターフェースは一旦削除 「enp14s0」は読み替え
[root@localhost ~]# nmcli connection delete enp14s0
# 「br0」のメンバーとして再度追加
[root@localhost ~]# nmcli connection add type bridge-slave autoconnect yes con-name enp14s0 ifname enp14s0 master br0
# NetworkManager 停止 & 起動で設定を有効にする
[root@localhost ~]# systemctl stop NetworkManager; systemctl start NetworkManager
念のため再起動
[root@localhost ~]# shutdown -r now
-----------------
■ゲストOSのインストール
GUI で仮想マシンの作成するため仮想マシンマネージャーをインストール
[root@localhost ~]# yum -y install virt-manager
ここから先はGUIの作業
Windowsからリモートデスクトップ接続して作業します
-----------------
仮想マシンマネージャーを起動して、ゲストを作成
CPUのコア数、HDDサイズ、メモリ容量などを割り当て、ISOイメージから起動。
DVDブートと同じ起動画面がくるので、通常と同じように設定してあげれば、ゲストOSのインストールは完了です。

いろいろなweサイトを参考にさせていただきました
https://centossrv.com/kvm.shtml
http://www.server-world.info/query?os=CentOS_7&p=kvm
http://www.torutk.com/projects/swe/wiki/Linux_KVM%E3%83%9B%E3%82%B9%E3%83%88%E3%81%AE%E3%83%8D%E3%83%83%E3%83%88%E3%83%AF%E3%83%BC%E3%82%AF%E8%A8%AD%E5%AE%9A-CentOS_7
http://spacekey.info/blog/archives/853
http://www.torutk.com/projects/swe/wiki/Linux_KVM%E6%93%8D%E4%BD%9C
http://orange.servecounterstrike.com/html/tomokaku_archives/2015/05/kvmguest-create.html
http://e-garakuta.net/techinfo/doku.php/linux/kvm
Centos7.0にWindowsClientからリモートデスクトップで接続 [コンピュータ]
たまには、PCネタで行きます。
Centos7.0にWindowsClientからリモートデスクトップで接続します。
参考にさせていただいたサイト
http://kogelog.com/2015/03/02/20150302-01/
ターミナルからrootで作業。
----------------------
外部からパッケージを取得
mkdir EPEL
cd EPEL
wget http://dl.fedoraproject.org/pub/epel/7/x86_64/e/epel-release-7-5.noarch.rpm
wget http://li.nux.ro/download/nux/dextop/el7/x86_64/nux-dextop-release-0-5.el7.nux.noarch.rpm
rpm -ivh epel-release-7-5.noarch.rpm
rpm -ivh nux-dextop-release-0-5.el7.nux.noarch.rpm
必要なものをインストール
yum install -y xrdp tigervnc-server
日本語キーボード対応
cd /etc/xrdp
wget http://www.mail-archive.com/xrdp-devel@lists.sourceforge.net/msg00263/km-e0010411.ini
cp km-e0010411.ini km-0411.ini
cp km-e0010411.ini km-e0200411.ini
cp km-e0010411.ini km-e0210411.ini
デーモンを起動して自動起動を有効 #Centos7からコマンド変わってます
systemctl start xrdp.service
systemctl enable xrdp.service
ファイアウォールを通します
firewall-cmd --permanent --zone=public --add-port=3389/tcp
firewall-cmd --reload
----------------------
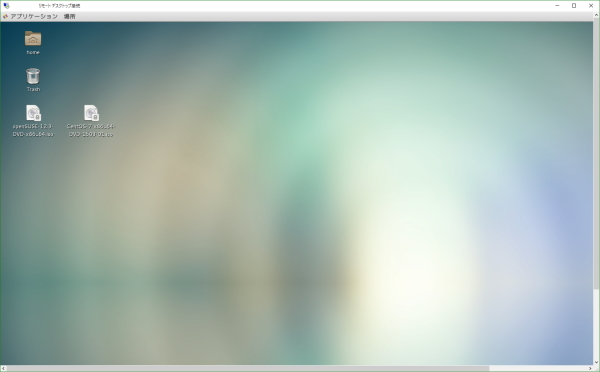
リモートデスクトップから、
接続先のIPアドレスを指定して、ユーザとパスワードを入力して接続すると、
デスクトップが表示されました。

次はKVMを使った仮想マシンのインストールを書く予定。
Centos7.0にWindowsClientからリモートデスクトップで接続します。
参考にさせていただいたサイト
http://kogelog.com/2015/03/02/20150302-01/
ターミナルからrootで作業。
----------------------
外部からパッケージを取得
mkdir EPEL
cd EPEL
wget http://dl.fedoraproject.org/pub/epel/7/x86_64/e/epel-release-7-5.noarch.rpm
wget http://li.nux.ro/download/nux/dextop/el7/x86_64/nux-dextop-release-0-5.el7.nux.noarch.rpm
rpm -ivh epel-release-7-5.noarch.rpm
rpm -ivh nux-dextop-release-0-5.el7.nux.noarch.rpm
必要なものをインストール
yum install -y xrdp tigervnc-server
日本語キーボード対応
cd /etc/xrdp
wget http://www.mail-archive.com/xrdp-devel@lists.sourceforge.net/msg00263/km-e0010411.ini
cp km-e0010411.ini km-0411.ini
cp km-e0010411.ini km-e0200411.ini
cp km-e0010411.ini km-e0210411.ini
デーモンを起動して自動起動を有効 #Centos7からコマンド変わってます
systemctl start xrdp.service
systemctl enable xrdp.service
ファイアウォールを通します
firewall-cmd --permanent --zone=public --add-port=3389/tcp
firewall-cmd --reload
----------------------
リモートデスクトップから、
接続先のIPアドレスを指定して、ユーザとパスワードを入力して接続すると、
デスクトップが表示されました。
次はKVMを使った仮想マシンのインストールを書く予定。
「Fire TV Stick」届いた [コンピュータ]
「Fire TV Stick」きました。
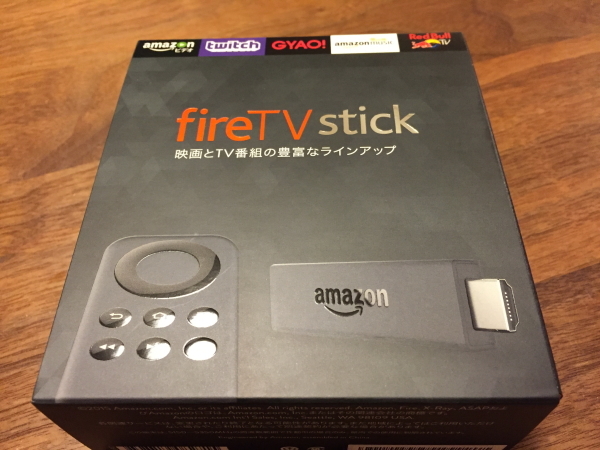
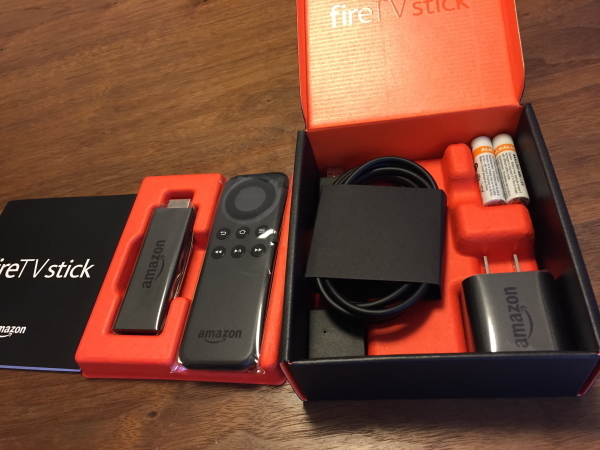
早速使ってみましたが、リモコンとすぐつながるし、やることはWiFiの設定くらいで簡単です。
以前、ドラマの「HOMELAND」をシーズン1だけみて、その後見ていなかったのですが、
シーズン2がプライム会員だと無料でみられるので、ちょっとお得な感じ。


早速使ってみましたが、リモコンとすぐつながるし、やることはWiFiの設定くらいで簡単です。
以前、ドラマの「HOMELAND」をシーズン1だけみて、その後見ていなかったのですが、
シーズン2がプライム会員だと無料でみられるので、ちょっとお得な感じ。
- 出版社/メーカー: Amazon
- メディア: エレクトロニクス
早割りリフト券 [Rest 息抜き]
早割りリフト券届きました。
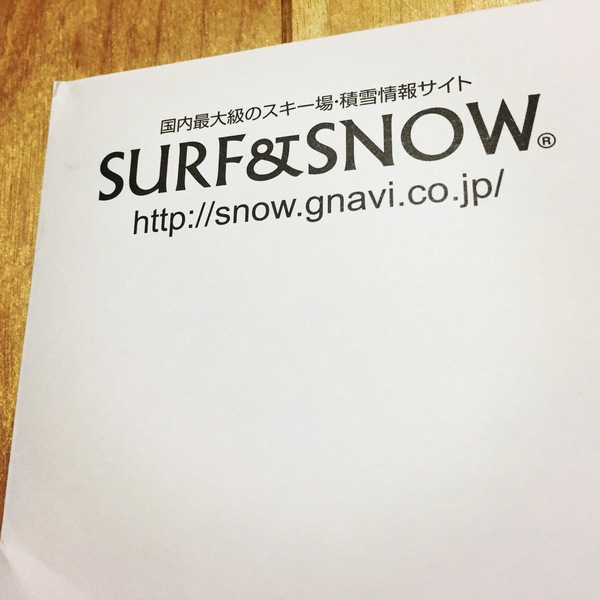
あとはスキー場に雪が降るのを待つだけです。

あとはスキー場に雪が降るのを待つだけです。
ペプシゴースト [食]
パッケージがハロウィンらしくて面白かったので買ってしまった「ペプシゴースト」。
http://www.pepsi.co.jp/ghost/

ミステリーフレーバーってどんなお味?
で、飲んだ感想は・・・・ドクターペッパー?
独特の風味なので、コーラだと思って飲まないほうがいいです。
3本も買ってしまった。。。
1本はなんとか飲んだけど、あと2本。
http://www.pepsi.co.jp/ghost/

ミステリーフレーバーってどんなお味?
で、飲んだ感想は・・・・ドクターペッパー?
独特の風味なので、コーラだと思って飲まないほうがいいです。
3本も買ってしまった。。。
1本はなんとか飲んだけど、あと2本。
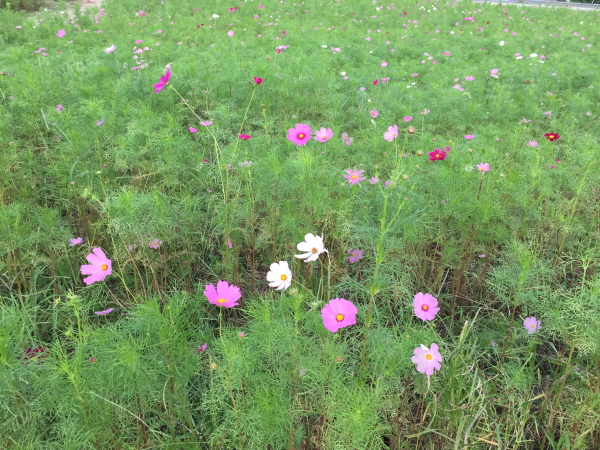
コスモスとトンボと秋の空 [Rest 息抜き]
天気が良く、いくらか散歩中にコスモスとトンボを見つけたのでiPhoneでパシャリ。


秋っぽくなってきました。


秋っぽくなってきました。
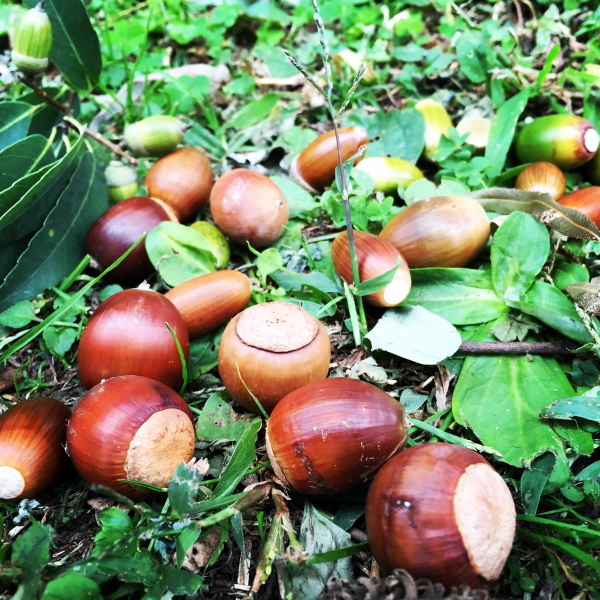
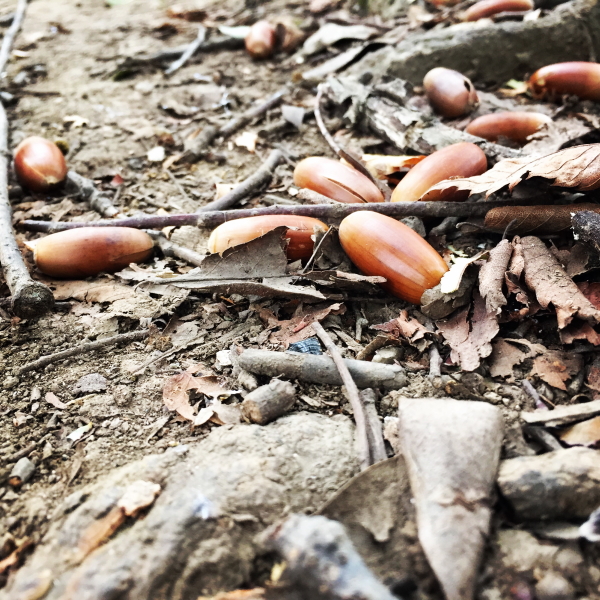
イロイロどんぐり [Rest 息抜き]
公園でどんぐりを見つけました。

大きいどんぐりはたぶんクヌギ

いろいろ拾ってきました #やってることは子供と一緒
大きいどんぐりはたぶんクヌギ

いろいろ拾ってきました #やってることは子供と一緒

「CEATEC JAPAN 2015」見学 [hobby 趣味]
「CEATEC JAPAN 2015」見学にいってきました。
http://www.ceatec.com/ja/
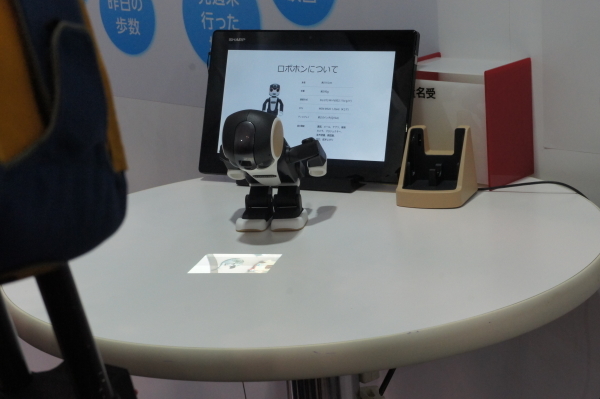
注目は、シャープブースで展示されていた「RoBoHoN(ロボホン)」でしょうか。
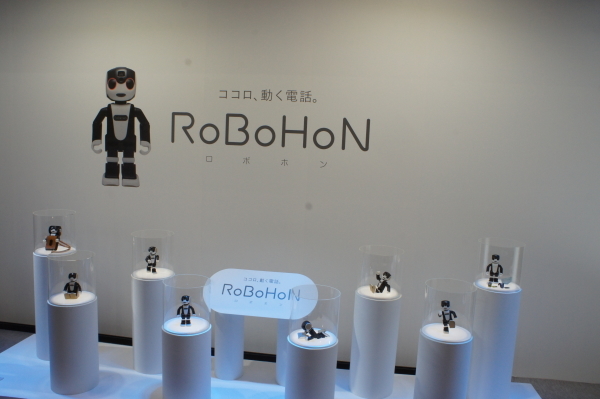
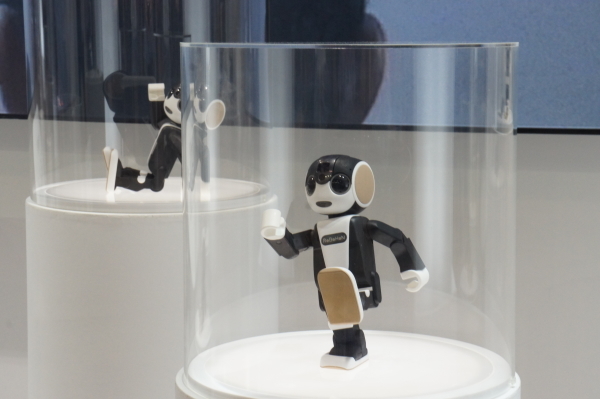
音声認識で操作でき、頭に組み込んだプロジェクタで床や壁に映像を写せます。
Youtubeにコンセプト動画も上がってます。
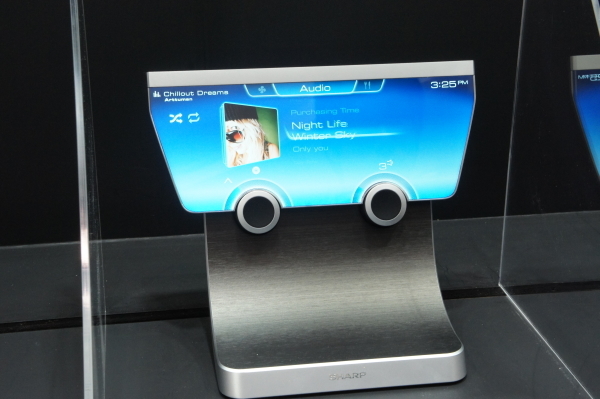
同じくシャープブースでは、曲面ディスプレイが変わりだねで展示されていました。#昨年もあった
それと、結構な人人だかりができていたのが、
世界初、洗濯物を自動でたたんでくれるという「laundroid(ランドロイド)」
http://laundroid.sevendreamers.com/
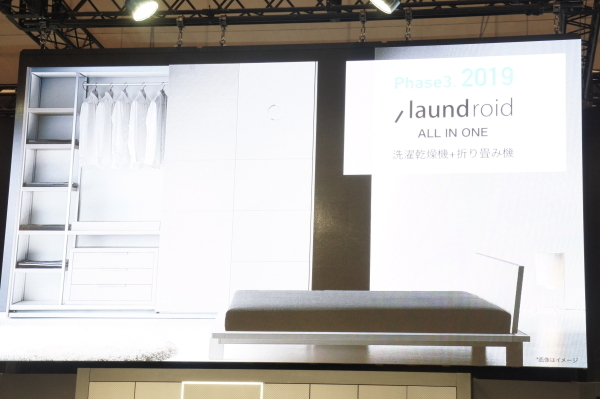
衣類を洗う、乾かすの次、たたむに注目して開発中の技術。
ざっくり感想ですけど、今年のCEATECは、勢いがない。
なんとなくですけど、規模は2/3くらいになってしまったかな。
東芝、SONY、日立など大手の展示がないことや、NTTドコモ、auなどもキャリアもいない。
この先の成長分野として、電装部品の割合が高まっている自動車の分野(ホンダ、マツダ、テスラなど展示あり)、ヘルスケア、IoT関連の展示が多かったように思います。
http://www.ceatec.com/ja/
注目は、シャープブースで展示されていた「RoBoHoN(ロボホン)」でしょうか。
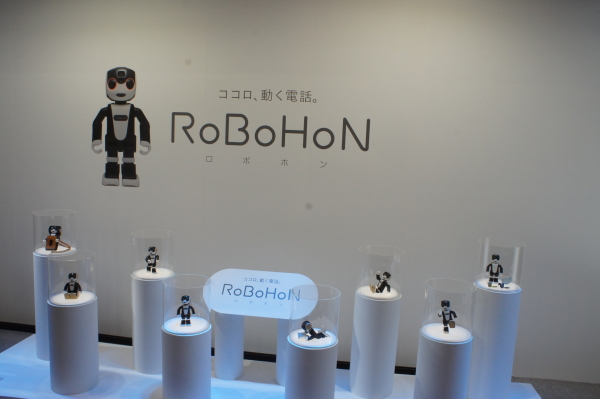

音声認識で操作でき、頭に組み込んだプロジェクタで床や壁に映像を写せます。

Youtubeにコンセプト動画も上がってます。
同じくシャープブースでは、曲面ディスプレイが変わりだねで展示されていました。#昨年もあった

それと、結構な人人だかりができていたのが、
世界初、洗濯物を自動でたたんでくれるという「laundroid(ランドロイド)」
http://laundroid.sevendreamers.com/

衣類を洗う、乾かすの次、たたむに注目して開発中の技術。
ざっくり感想ですけど、今年のCEATECは、勢いがない。
なんとなくですけど、規模は2/3くらいになってしまったかな。
東芝、SONY、日立など大手の展示がないことや、NTTドコモ、auなどもキャリアもいない。
この先の成長分野として、電装部品の割合が高まっている自動車の分野(ホンダ、マツダ、テスラなど展示あり)、ヘルスケア、IoT関連の展示が多かったように思います。
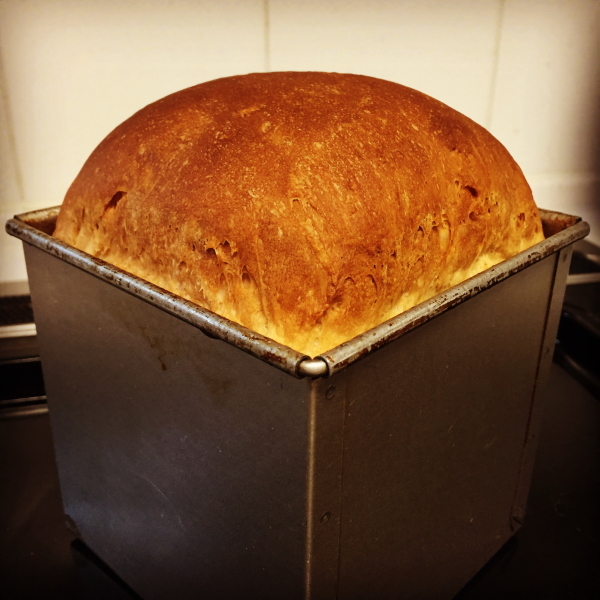
新しいパン型 [食]
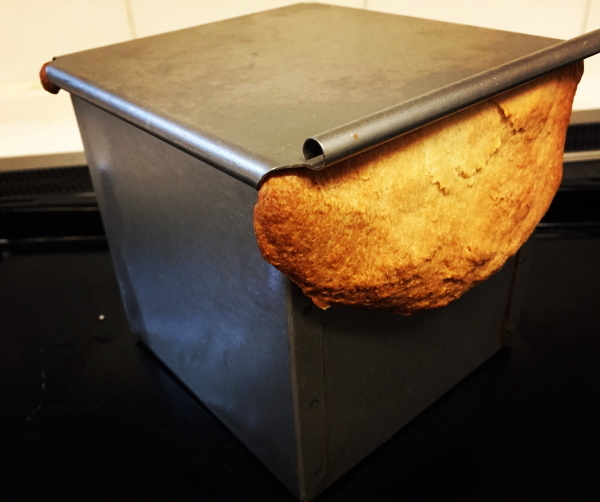
新しいパン型を買いました。
今まで1斤のものしか持っていなかったのですが、今回購入したのは、1.5斤のもの。

ちょっといいお値段でしたが、空焼き不要で、型からも外れやすとのことらしく、早速焼いてみました。
目分量で分けたので、凸凹です。。。

型からはスポッと外れ、値段の差を実感。
やっぱ道具だなと。

今まで1斤のものしか持っていなかったのですが、今回購入したのは、1.5斤のもの。

ちょっといいお値段でしたが、空焼き不要で、型からも外れやすとのことらしく、早速焼いてみました。
目分量で分けたので、凸凹です。。。
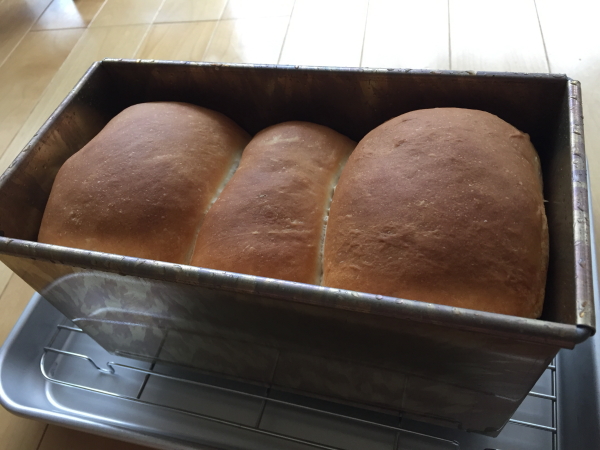
型からはスポッと外れ、値段の差を実感。
やっぱ道具だなと。

散歩道の秋桜 [Rest 息抜き]
まだかなぁと思っていた秋桜がキレイに咲いていたので、パチリ。


イロイロな色が咲いています。
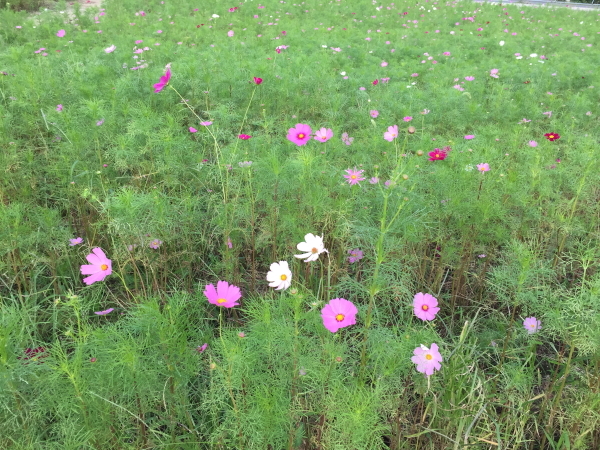
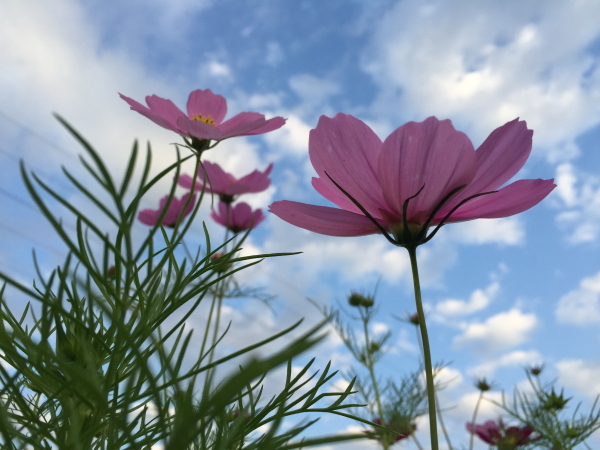
新しいカメラ欲しいけど、iPhoneで思った以上にキレイに撮れるので、iPhoneを新しいモデルに機種変更したいかも。


イロイロな色が咲いています。

新しいカメラ欲しいけど、iPhoneで思った以上にキレイに撮れるので、iPhoneを新しいモデルに機種変更したいかも。
久しぶりの公園 [Rest 息抜き]
久しぶりに近くの公園へ遊びに行ってきました。
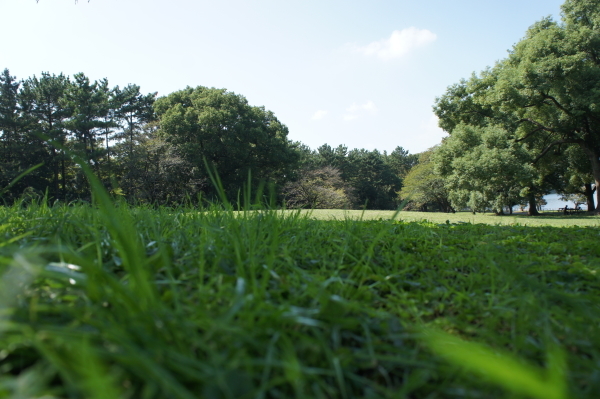
朝から唐揚げなどつくったお弁当。
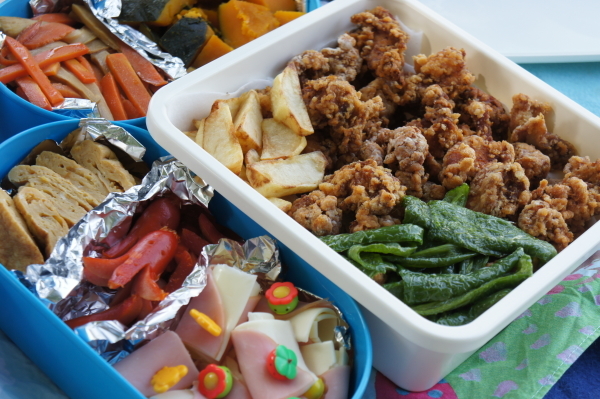
子供たちは、松ぼっくりやらどんぐり拾っていたようです。
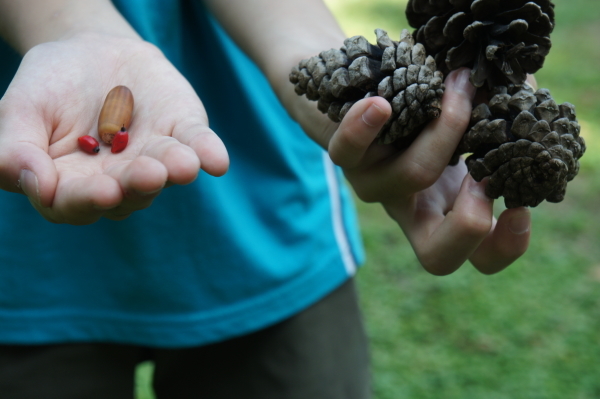
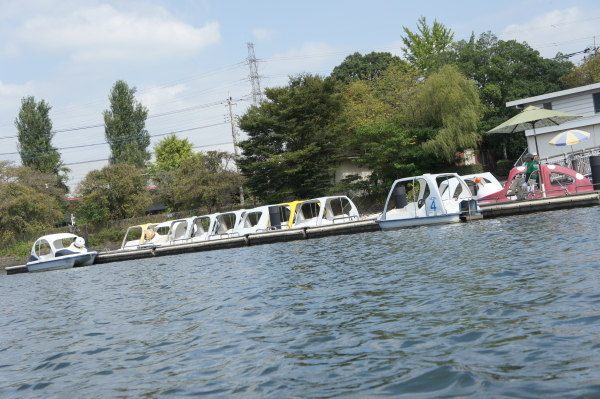
ボートも久しぶりに乗れて楽しかった。
用事がいくらかあったので、早めに切り上げましたが、天気のいい日にまた行きたいと思います。

朝から唐揚げなどつくったお弁当。

子供たちは、松ぼっくりやらどんぐり拾っていたようです。

ボートも久しぶりに乗れて楽しかった。

用事がいくらかあったので、早めに切り上げましたが、天気のいい日にまた行きたいと思います。
角食と山食 [Living 暮らし]
久しぶりに食パンをつくりました。
角食・・・発酵しすぎてハミ出し。
2回目は、ハミ出しの心配がない、山食。
型から出して、両方並べたところ。

食べればどっちもまぁいい感じですが、まだまだッス。
角食・・・発酵しすぎてハミ出し。

2回目は、ハミ出しの心配がない、山食。

型から出して、両方並べたところ。

食べればどっちもまぁいい感じですが、まだまだッス。
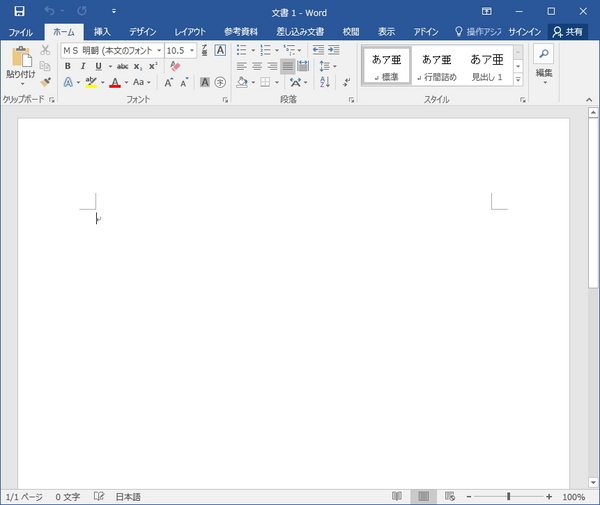
「Office 2016」インストールしてみた [コンピュータ]
「Office 2016」インストールしてみました。
Word
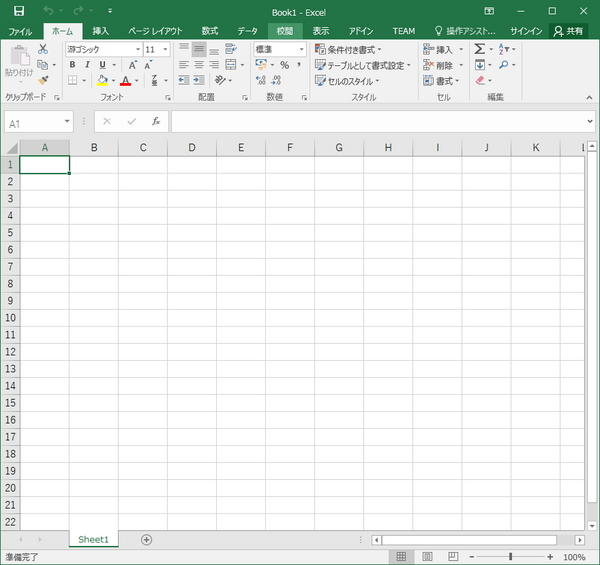
Excel
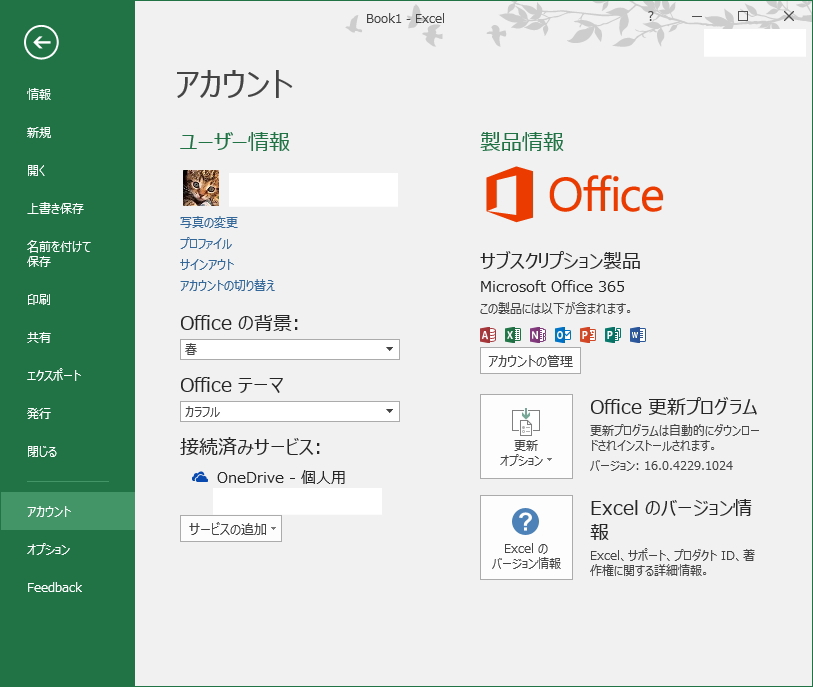
アカウント情報
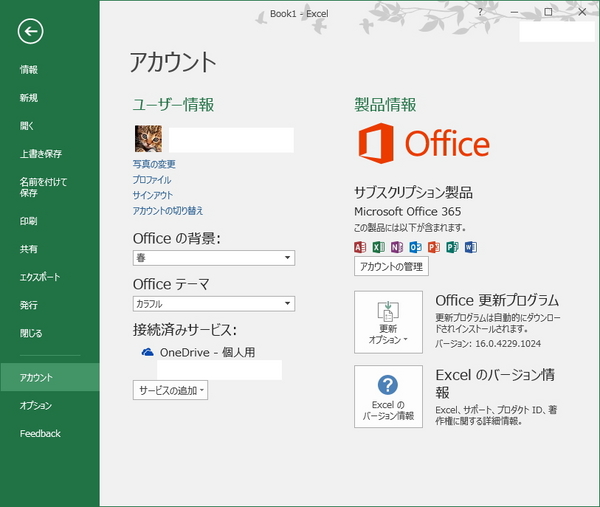
access、word、Excel、Oulookなど主要の製品は利用できますが、
個人的には、お勉強用にSharePointが利用可能なOptionが欲しい。
Word
Excel
アカウント情報
access、word、Excel、Oulookなど主要の製品は利用できますが、
個人的には、お勉強用にSharePointが利用可能なOptionが欲しい。
「Office 2016」リリース [コンピュータ]
「Office 2016」リリースされましたね。
http://news.microsoft.com/2015/09/22/microsoft-releases-office-2016/
私はOffice365Soloのサブスクリプション契約しているので、追加料金なく利用可能です。

インストールのところに、新着情報にOffice2016が表示されています。
後ほど、インストールしてみます。

http://news.microsoft.com/2015/09/22/microsoft-releases-office-2016/
私はOffice365Soloのサブスクリプション契約しているので、追加料金なく利用可能です。

インストールのところに、新着情報にOffice2016が表示されています。
後ほど、インストールしてみます。
できるOffice 365 Business/Enterprise対応 2015年度版 できるシリーズ
- 出版社/メーカー: インプレス
- 発売日: 2015/03/18
- メディア: Kindle版
じゅぴたー さん

-
nice! 11896
記事 4268
テーマ パソコン・インターネット
プロフィール
ブログを紹介する
【ソフマップ】

【Dell】

【ソニーストア】


【McAfee】

